
I would like to welcome Lisa Soko as the guest blogger for today. Lisa has been telling me about her beautiful little house she is in the process of redoing and asked if she could share her “tried & true” advice with all of us here on the Decor Blog. She’s doing such a wonderful job on her home I can’t wait to hear what she has to say!
Hi, I’m Lisa. Thank you so much for having me today. I absolutely love reading the décor blog so I’m really glad for the opportunity to contribute. First I would like to give you a little background on my “little lovely home”, as I fondly call it. My husband and I bought the home a few months before our wedding. It is in a pretty area in a private community in NJ, the perfect place to start off our new life as a married couple. The home is 1200-sq and was built over 60 years ago. When we purchased the house it was completely and totally dilapidated- I admit I had to be convinced into it. I never dreamed it could turn into a beautiful home. Well, my husband’s strong will combined with my background in design really got us far. It’s now 5 months since we began the renovation and our house is looking beautiful. I look forward to coming home every day!
Today I would like to tell you about me experience redoing the ½ bathroom on our first floor. The bathroom will be used often since we host many parties and have a lot company so it was important to me that it looks really nice. The major problem was that the bathroom is tiny. It’s surrounded by the dining room, kitchen and laundry room, which are all pretty small too, so it was not an option for us to expand. Well, I’m persistent and I was determined to rejuvenate, brighten and somehow expand the bathroom.
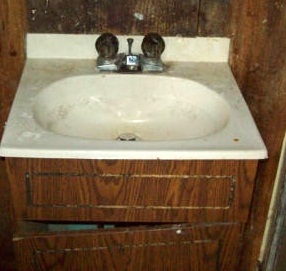
In Interior Design school we were consistently taught that what makes the most difference in a room (especially if it’s small) is the color scheme. So away went the dark brown and gold vanity, away with the ivory mosaic floor from the 1920’s,wall tiling and cracked toilet, away with the bulky brown/beige, grimy medicine cabinet. This room was desperate for an overhaul.

To save money I decided not to re-tile and instead used only paint and some moldings for the walls. I put in wainscoting on the bottom half of the bathroom, painted bright white, and painted the top a cool, fresh blue color. This was a real inspiration as wainscoting is absolutely beautiful and (surprise) really inexpensive. A good handyman can put it up perfectly in an hour and that’s the major bulk of the cost.
Rule # 1: In small spaces try to incorporate a bright color with a bright white- it expands the space visually.
The wainscoting adds an elegant touch to the rather trendy color and the bright white freshens up the space. In my opinion wainscoting looks really posh too.
For the floor I chose a plain white tile. Light colored floors make the floor appear to open up. I chose the largest tiles I could get for the cheapest price. Small tiles, such as a penny rounds, are magnificent but they only work in a large space. In a small area it makes it look cluttered.
Rule # 2 bigger tiles look cleaner in a small areas.

You may think the ceiling doesn’t make a difference, especially in a bathroom, but actually the ceiling can work as a powerful tool. I can’t recall where but I once read that adding moldings around the ceiling, painted the same color as the ceiling creates the illusion of a raised ceiling. Well I tried it and its true!
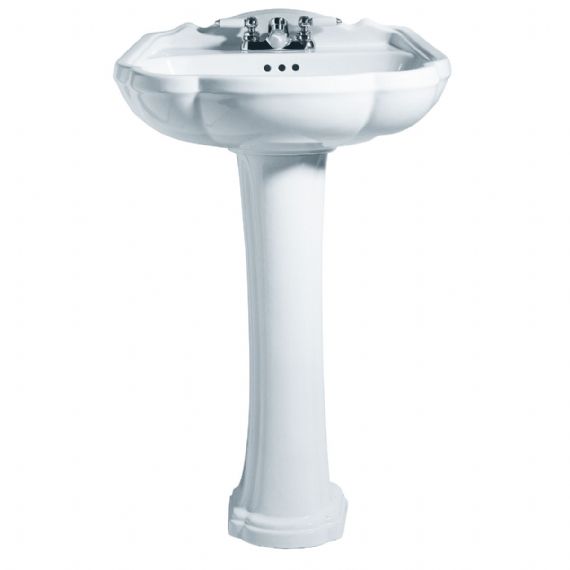
Now that the floor, ceiling and walls were done I had to start with the bathroom essentials. The old vanity was promptly disposed of so I had to replace that. I began looking around for vanities and came to two realizations #1 a really nice vanity is expensive #2 vanities take up a significant amount of space. For a full bathroom a vanity is definitely an ideal place to store toiletries, but for a bathroom with just a toilet what did I need it for? So instead I purchased a beautiful, delicate pedestal sink (for a quarter of the price). What a space saver!!! It looks so elegant and barely takes up any room. I bought a plain white toilet to match the sink.
Rule #3 when possible trade a vanity for a pedestal sink.

A large mirror is perhaps the most important item to consider when decorating a small room. Mirrors reflect light and pick up color and pattern. A 28” round mirror from Ikea fit perfectly over my sink and not only reflects the room but looks pretty too. I did all the bathroom accessories (towel bar, toilet paper holder etc.) in a chrome finish to reflect as much light as possible.
I placed a chrome, wall hung fixture over the mirror as well. I chose a fixture that holds three 60-watt bulbs to brighten up the bathroom as much as possible.
Rule #4: proper lighting opens up the look of your bathroom and adds interest
Now my bathroom is completed and by following all these tips I accrued over the years it looks fabulous! I revel in all the compliment we receive knowing we did an excellent job making at cramped, dowdy bathroom look spacious and up-to-date and best of all without exceeding our budget ($400!!!).
Cost:
Paint $15- We only needed a small amount of blue. The white was left over from another project
Moldings $35
Tiles $15- Remnant
Pedestal Sink $89-Sale
Toilet $90-Sale
Light fixture $12 + glass shades $6 =$18
Mirror $25
Accessories $22
Total Labor (handyman & plumber) $80
Total bathroom remodeling cost: $389
Best of all we had a fabulous time doing our bathroom. All you have to do it take it easy and make it fun! Good luck to all of you!
If you would like to submit a story of your home remodel click here


Now I know who to go to when my bathroom gets remodeled! Thanks for such great ideas!
Sounds like you did a really professional job. A little creativity and planning can go a long way. I would love to see a picture of the finished project.